Hello RS485 with Arduino

Nothing fancy here, just trying to get started with RS485 and Arduino. So here we go for a basic setup with one master that only emits and one slave that just listens. See the comments for the wiring:

/* RS 485 V1 Master, using a SN75176BP

                              -------
                          RO -|     |- VCC [connect to 5v]
                              |     |
                          RE -|     |- B-------------->   [connect to Slave's B]
                              |     |        | 120R (parallel resistor)
          connect to 5V   DE -|     |- A-------------->   [connect to Slave's A]
                              |     |
   connect to pin 1 (TX)  DI -|     |- GND [connect to GND]
                              -------

*/
const int ledPin = 13;      // the pin that the LED is attached to

void setup() {
  Serial.begin(9600);
  pinMode(ledPin, OUTPUT);
}

void loop() {

  byte b = 0;

  Serial.write(b);
  analogWrite(ledPin, b);
  delay(1000);

  b=255;

  Serial.write(b);
  analogWrite(ledPin, b);
  delay(1000);
}

And now for the slave:

/* RS 485 V1 SLAVE, using a SN75176BP

                              -------
   connect to pin 0 (RX)  RO -|     |- VCC [connect to 5v]
                              |     |
          connect toGND   RE -|     |- B-------------->   [connect to Master's B]
                              |     |        | 120R (parallel resistor)
                          DE -|     |- A-------------->   [connect to Master's A]
                              |     |
                          DI -|     |- GND [connect to GND]
                              -------

YOU'LL HAVE TO DISCONNECT RO DURING UPLOAD TO I/O BOARD!!!!!!!!!                          

*/
const int ledPin = 13;      // the pin that the LED is attached to

void setup() {
  Serial.begin(9600);
  pinMode(ledPin, OUTPUT);
}

void loop() {
  byte brightness;

  if (Serial.available()) {// check if data has been sent from the computer:

    brightness = Serial.read(); // read the most recent byte (which will be from 0 to 255):

    analogWrite(ledPin, brightness); // set the brightness of the LED:
  }
}

If all goes according to the plan, you should see something like this:


Labo workbench light, a bit more clever than a switch

Using an old Arduino, a MosFet transistor, 5m of led strip and an old alarm detector (SIEMENS IR100B), I built an interesting little lighting set up.
The idea is that the leds switch on as you approach the desk.
The detector is a bit sensitive, but it does the job ok.
I was curious about the free run consumption when the leds are turned off.
Doing this project I got my answer: it’s very little. Less than 100mW according the wattmeter.

In attachment, code, schematics and video for reuse and improvement.

thanks to fritzing
/* Theo Reichel, Reichel Complex AI, 02/2010 */

int sensorPin = 2; // interrupt 0
int sensorAlimPin = 4;
int ledArrayPin = 9; // PWM
int buttonPin = 3; // interrupt 1
int ledPin = 11; // PWM

volatile bool sensor_status = LOW;
volatile bool button_pressed = LOW;

volatile unsigned int light_power;

unsigned long sensor_millis_diff = 0;
unsigned long sensor_status_age = 0;

volatile int menu;
int i;

void setup()   {
  Serial.begin(19200);
  Serial.println("Labo desk light with detector started");

  pinMode(ledArrayPin, OUTPUT);
  pinMode(sensorAlimPin, OUTPUT);
  pinMode(ledPin, OUTPUT);
  pinMode(buttonPin, INPUT);

  digitalWrite(sensorAlimPin, HIGH);

  attachInterrupt(0, sensor_trigger, CHANGE);
  attachInterrupt(1, user_button, FALLING);
}

void loop()
{
// menu
  while (menu == 0)
    detector();

  while (menu == 1)
    always_on();

  while (menu == 2)
    always_off();
}

void fadein()
{
  for (light_power; light_power<255; light_power++)
  {
    analogWrite(ledArrayPin, light_power);

    if (button_pressed) // button can interrupt fade
    {
      button_pressed = LOW;
      break;
    }

    delay(5);
  }
  if (light_power == 255) // electrical workaround
    digitalWrite(ledArrayPin, HIGH);
}

void fadeout()
{
  for (light_power; light_power > 0; light_power--)
  {
    analogWrite(ledArrayPin, light_power);

    if (sensor_status) // sensor can interrupt during fadeout.
      break;

    if (button_pressed) // button can interrupt fade
    {
      button_pressed = LOW;
      break;
    }

    delay(10);
  }
  if (light_power == 0) // electrical workaround
    digitalWrite(ledArrayPin, LOW);
}

/////////// programs /////////////

void detector()
{
  digitalWrite(ledPin, 50);

  if ( sensor_status )
  {
    Serial.print("update sensor_status_age: ");
    Serial.println(sensor_status_age);
    sensor_status_age = millis();  

    if (light_power < 255)
    {
      Serial.print("fadein from light power: ");
      Serial.println(light_power);

      fadein();
    }
  }
  else
  {
    sensor_millis_diff = millis() - sensor_status_age;

    if ( light_power > 0 && sensor_millis_diff > 60000 )
    {
      Serial.print("fadout from light power:");
      Serial.print(light_power);
      Serial.print(", duration without motion");
      Serial.println(sensor_millis_diff);

      fadeout();
    }
  }
}

void always_on()
{
  digitalWrite(ledPin, HIGH);

  if (light_power < 255)
    fadein();
}

void always_off()
{
  analogWrite(ledPin, LOW);

  if (light_power > 0)
    fadeout();
}

/////////// interrupts /////////////

void sensor_trigger()
{
  sensor_status = !digitalRead(sensorPin);
}

void user_button()
{
  button_pressed = HIGH;

  if (menu == 2)
    menu = 0;
  else
    menu++;
}

The next project in the same wave is to make a nice PCB, arduino compatible with FET and detector on board.
Adding some nice little things like RTC, light sensor and a little led display, I plan to build a better light management.
For instance, if the room is bright enough the leds stays off.
If the time is far in the night, meaning that I’m not supposed to be awake, the light is faded to keep it soft for my eyes.
And of course a single push button to iterate different modes.

There is probably a lot more to do to make “clever” lights.
Feel free to share your ideas, I’m very interested.
But please, don’t mention clapping in the hand like in SF movie. I believe the light is improved if it adapts to our presence without our explicit will or interaction.

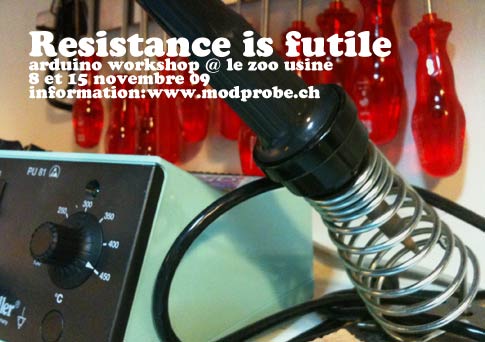
Resistance is futile @ le Zoo/Usine – 8 et 15 novembre 09

flyer

Lire ce billet dans la langue de Voltaire.
Read this post in Shakespeare’s tongue.


Le spleen du dimanche d’automne n’est pas une fatalité, venez découvrir et apprendre à utiliser les merveilles électriques de la plateforme arduino avec le allstar cast de modprobe.ch. A la soudure et robotique Theo Reichel, au platine du code Monsieur Java en personne Renaud Richardet, acompagné en exclusivité mondiale par le über-guru du C Philippe Vaucher en personne, finalement au support moral on trouvera le pousseur de pixel David Hodgetts. Le workshop s’adresse à un large public, artiste et bricoleur du dimanche bienvenu.

Hard

Pour suivre le workshop dans les meilleures conditions, il faut amener un laptop (mac linux ou windows) et un kit arduino. Pour ceux qui le désirent, l’usine a 16 kits starter arduino à vendre. Il est évidement également possible de venir avec son propre matos tant qu’il s’agit de la même plateforme (micro-contrôleurs ATMEGA8-168-328). Sur place, vous trouverez plein de composants marrants: moteurs linéaire ou pas à pas, servos, LED puissante et moins puissantes, drivers de puissance, transistors, ICs en tout genre, bière etc. Dans le bordel et plus spécifiquement pour arduinos et artistes, module son (wave), module de puissance pour mécaniques, plaque de prototypage à souder, module Xbee, etc.

Thunes

Entrée : 10 balles Kit arduino (optionnel) : 50 balles (Arduino Duemilanove 328, breadboard, composants divers, fils, voir ici pour le détail)

Lieu

Le zoo de l’usine
4 pl. des volontaires
1204 Genève
www.lezoo.ch

Programme

Samedi 7 novembre 2009, 10h-12h

Des-puces-lage : Balade sur la plaine de plainpalais à la recherche de matériel électronique pour occuper le workshop. Participants les bienvenus.
Rendez-vous à 10h00 à la roulotte (46.197929, 6.139324)

Dimanche 8 novembre 2009, 16h-20h

Premier workshop : introduction à la plateforme arduino
En gros :
30min intro, qu’est-ce que l’arduino, exemple d’utilisation.
30min installation sur les machines et clignotement d’une LED
1h presentation de projets connus
1h mini-workshop pour se faire les dents sur la plateforme
1h presentation de project modprobe et potes.

Samedi 14 novembre 2009, 10h-12h

Marché aux puces: Deuxième balade plus ciblée : circuit-bending, méchanique, électronique de puissance, etc.
Rendez-vous à 10h00 à la roulotte (46.197929, 6.139324)

Dimanche 15 novembre 2009, 16h-20h

Second workshop : Réalisation d’un projet arduino, présentation de projets hardcores
1h, présentation de projets poussés, de quoi faire rêver
3h, workshops les mains déliées avec le soutiens d’une équipe de 5 gars compétents, dans le domaine de l’électronique, de l’informatique et du lard.

Formulaire d’inscription

Nous avons a disposition 16 kit “Budget pack” d’adafruit industries. Pour réserver votre kit ou vous inscrire au workshop, merci de remplir le formulaire ci-dessous.


Resistance is futile @ the Zoo/Usine Geneva november 8 and 15 2009

No need to suffer from autumnal sunday spleen anymore… Come discover the electrical wonders of the arduino platform with the allstar modprobe crew: on the soldering iron and general robotics expert, Theo Reichel. Spinning and grooving, the one and only Mr Java, Renaud Richard, exceptionally assisted by the world acclaimed all time C über geek, Phillipe Vaucher. Finally, on general moral support, David Hodgetts the pixel pusher. The workshop is open to all. Artists and sunday do-it-yourselvers welcome !

Hard

To follow the workshop in the best consitions, you will need a laptop (mac, linux or win) and an arduino kit. Le zoo-usine has 16 arduino starter kits to sell for interested participants. Of course, it is also possible to come with your own chips as long as they are based on the ATMEGA8-168-328 family. Plenty of fun components will be available to play with: motors, leds, sensors, ICs, wave modules, etc.

Finance

Entry : 10 chf Arduino kit arduino (optional) : 50 chf (Arduino Duemilanove 328, breadboard see here for details).

Location

Le zoo de l’usine
4 pl. des volontaires
1204 Genève
www.lezoo.ch

Language of the workshop

The workshop is in french.
But if there is subscribers speaking only english, the workshop will be translated in live for them.

Program

Saturday november 7 2009, 10h-12h

Object-Hunting: Stroll around the plaine of plainpalais’ s flea market on the look for electronic treasures. Workshop participants welcome.
Meeting point 10h00 @ “la roulotte” (46.197929, 6.139324)

Sunday november 8, 16h-20h

first workshop : introduction to the arduino platfom
30min intro, what is arduino , real world examples.
30min arduino hard and soft install and blinking led test. 1h case studies.
1h applied arduino examples.
1h modprobe project presentation.

Saturday november 14 2009, 10h-12h

Flea-market: The second stroll : circuit-bending, mechanics, power electronics, etc.
Meeting point 10h00 @ “la roulotte” (46.197929, 6.139324)

Sunday november 15 2009, 16h-20h

Second workshop : warm-up: production of an arduino project.
1h presentation of crazy hardcore skills projects
3h free-form workshop

Enroll here

We have 16″Budget pack” kits from adafruit industries. To order an arduino kit or to to book a seat for the workshop please fill in the following form.



Party for the new lab & multitouch table

On the 19th of February 2009 we had a party to celebrate the new arrangement of our offices.

At the end of november 08, I ordered new desks at my father’s company. It seems trivial to change desks, but in our office it’s been a revolution. The idea was to bring up the lab and improve the use of space.

This is why the magnificent man call dad sent 2 guys to drill, screw and fix long pieces of wood on the walls (410cm X 90cm each).
The result is pretty nice, very useful and already paying off.

So earlier this year, in our new lab, David and me had a great time building our first project together. We were very proud of our new born, and had the honor to present it during the party.
So to say, this party became the “multitouch and toys party” while the brand new desks were reduced to their first purpose : holding the huge amount of wine bottle we brought.

A lot of people enjoyed the table and the store window turned into a multitouch screen with our homemade IR funny throwies.

Show !

img_0806


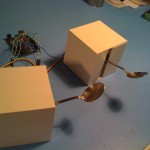
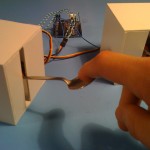
a spoon to feed, two prototypes

For Ida.

Well, this project seemed to be so easy, but it so wasn’t.
The description is the following : “Before dying I had to make an apparel able to transmit touch or pressure sensation through the distance.”
The purpose of such an apparel is obvious, trying to reduce body distance and allowing hand collision in spite of kilometers.
There are some kind of relationships who need more than the spiritual belief of “we keep in touch” when contact isn’t possible.

So why the spoon ?
The symbolic of the spoon used to feed is strong. No need to define what sort of emotions have been transmitted through our first spoon of food. No need to express the feelings we had towards those who used to feed our mouth. We all have a different kinds, but probably strong for everyone.

Feeding is the responsible act for keeping alive.
(Alimenter est l’act responsable de maintenir en vie)

The spoon is a cold iron tool. With at least one curve and a nest for something liquid, difficult to keep by definition. It’s an agile shape for our clumsy hands, and it does the job.
Spoon by its shape, size and material is also an erotic object. Not to feed we agree, fork is more romantic, but for imagination.
As I was born in a protestant city, I’ll let you figure out what you can do and how to play around with a spoon. Some people could be shocked, and It’s really not my kind, oh no !
(the truth : I keep alive the dream and wait patiently for a receptive body, no need to spread desire if I release the code and plans, no?)

Somehow, the spoon is for food what this prototype is for the relationship, an artifact of love.
A new tool to feed the relationship.

Code and electronic will come later.
Right now, what matters is : Arduino, modified servo, spoon, capacitive meter.

img_0608

img_0610

post WRAP ALIX

http://en.wikipedia.org/wiki/Post_Tenebras_Lux

Un petit mot à propos de la dernière carte de pcengines, elle est très bien.
Malgré mes tests, je ne suis pas sur qu’elle convienne à l’utilisation bureautique, sous forme de terminal, mais elle séduit en tous les cas pour les utilisations que je compte en faire; un firewall, un “voiture téléguidée”, un AP.

Récemment, j’aitesté la consommation de la WRAP en charge, je ferais bientôt la même chose pour cette carte.
La WRAPUne WRAP à SFNETUne cousine, la SOEKRIS5WAlimentation de laboratoireL’ALIXL’ALIX et les DivXL’ALIX sous Windows !

Bon, pour rester dans la thématique “malgré ces ténèbres illuminés genevois rien”, je vais me faire une petite
bière.